Pages

mardi 10 septembre 2013

Lemon Drop Cake

Lemon Drop Cake

Add a special touch and fresh citrus zing to a cake mix treat. Fork-poking and pouring sweetened lemon juice over a baked Betty Crocker® cake is the delicious secret.
Prep Time: 25 min Total Time: 3 hrs 15 min Servings: 12 servings

Ingredients

  • 1  box Betty Crocker® SuperMoist® lemon cake mix
  • Water, vegetable oil and eggs called for on cake mix box
  • 1  cup powdered sugar
  • 1/4  cup fresh lemon juice (1 large lemon 


    • 1  container Betty Crocker® Rich & Creamy lemon frosting
    • Lemon drop candies, crushed, if desired

    Directions

    1. 11 Heat oven to 350°F (325°F for dark or nonstick pans). Line 2 (8-inch) square pans with foil, letting foil hang 2 inches over 2 opposite sides of pans. Grease bottoms and sides of foil with shortening or cooking spray.
    2. 22 Make cake mix as directed on box, using water, oil and eggs. Pour into pans. Bake 28 to 33 minutes or until toothpick inserted in center of cake comes out clean. Cool 15 minutes.
    3. 33 In small bowl, mix powdered sugar and lemon juice. Poke top of warm cake every 1/2 inch with long-tined fork, wiping fork occasionally to reduce sticking. Drizzle and spread lemon mixture over top of cake. Refrigerate about 2 hours or until chilled. Remove cakes from pans by lifting with foil; peel away foil.
    4. 44 In small microwavable bowl, microwave frosting uncovered on High 15 seconds. On serving plate, place 1 cake, rounded side down; trim if necessary so layer rests flat. Spread with half of frosting. Top with second cake, rounded side up. Frost top of cake with remaining frosting. Garnish with lemon drop candies. Store loosely covered at room temperature.

    Tips & Techniques

    • High Altitude (3500-6500 ft):
      Follow High Altitude directions on cake mix box for 8-inch pans.
    • Substitution
      You can use two 8- or 9-inch round cake pans instead of the square pans.
    • How-To
      To crush lemon drops, place in heavy-duty resealable food-storage plastic bag and crush with rolling pin or meat mallet.
    Continue Reading...

    lundi 9 septembre 2013

    Nice and Crispy Waffles

    Nice and Crispy Waffles


    I have been looking for a waffle recipe that will have a bit of a crunch to it and I finally found one.  It came from this vintage Betty Crocker Cookbook.  If you don’t happen to have it in your collection, you really should find one on E-bay or your local used bookstore.  It is a treasure. Inside you will find basic recipes that are tried and true.  Betty Crocker and I go way back.  When I was a senior in high school I received the Betty Crocker award.  Many things have changed  since then, but  I am still the same overachiever when it comes to cooking.
    In my search for the perfect waffle I tried the recipe that I had read so much about.  One that called for separating eggs and using beaten egg whites as well as a stick of melted butter.  Thank heavens that it produced a waffle that was as limp as a dish rag.  It was way too much trouble to make in the morning when you have starving mouths to feed.  So I won’t be using that one again.  But, this recipe from Betty Crocker I love it ! 
    Even if you have a great recipe if you don’t have a good waffle iron it could be disastrous.  And let’s go a little further.  You can have a great waffle iron, but you have know how to use it and take care of it to cook great waffles.  One of the most important steps is to season the waffle iron.  Before using it the first time brush vegetable oil on both the top and bottom grids.  Turn the iron on and let it heat for about 15 minutes.  Wipe away the excess oil or just let the first waffle absorb the grease.  Then trash the waffle.  Unless you make waffles with an ingredient that might stick to the iron, for example cheese,  you  probably won’t need to season the iron again.  I’ve  had over industrious students to clean the inside as well as the outside of the iron.  If that happens you will definitely have to reseason it.
    Make sure that your waffle iron is hot before you pour in the batter. Most waffle irons have a light that will come on when it is preheating and will go off when heated to the proper temperature.  Check your use and care manual.  It could do just  the opposite and the light could come on when it is hot enough to use. 
    Play around with the amount of batter to pour in.  Don’t be too scrimpy.  You want the top grids to be able to reach the batter.  I like to pour in just a little too much to make sure that it is filled to capacity.  Don’t try to clean the batter off as it drips.  It will be easier later when the batter cooks. This way you will not smear it everywhere.
       
    Unless you have two or three waffle irons going at once it takes awhile to cook them.  To keep them warm and crisp  preheat your oven to about 200 degrees.  Put the waffles on a cooling rack placed on top of a baking pan in the oven.  If you are like me many of the waffles will be eaten right out of the waffle iron.  Those little crunchy things are hard to resist!

    Waffles adapted from Betty Crocker
    • 2 eggs
    • 2 cups flour * I used self rising flour and left out baking powder and salt*
    • 1 3/4 cup milk
    • 1/2 cup oil
    • 4 teaspoons baking powder
    • 1/2 teaspoon salt
    Heat waffle iron.  Beat eggs until light and fluffy.  Add milk beat until airy. Beat in remaining ingredients with a rotary beater or mixer until smooth.  Pour batter in the middle of a hot waffle iron.  Bake for about 5 minutes.  You have to be patient.  Do not open until the waffle has almost stopped producing steam.  Remove carefully.
    Yields about six 7 -in waffles 
    Here’s what my class did with the same recipe.  Notice the difference in color.  I have about fives types of waffle irons that they used.  Some better than others.  The lab was a huge success.  I am loving the maturity of the juniors and seniors that I have this semester!
    1st Block Kitchen 1
    1st Block Kitchen 2
    1st Block Kitchen 3
    1st Block Kitchen 4
    1st Block Kitchen 5
    1st block Kitchen 6
    2nd Block Kitchen 1
    2nd Block Kitchen 2
    2nd Block Kitchen 3
    2nd Block Kitchen 4
    2nd Block Kitchen 5
    2nd Block Kitchen 6
    Happy cooking,
    Top chef
    Continue Reading...

    Luscious Lemon Bars

    Luscious Lemon Bars


    I made these lemon bars to take to my first tennis match of the season.  It was my first time making them and I don’t really know why I have not made them before now.    I take that back I do know why.  I like them too much!  To me there is nothing better than a sweet and tart dessert.  I love lemon meringue pie and lemon cake.  Now I have another favorite.  It is easy to put together.  The bars have just  two layers, but you don’t have to let the first layer cool before pouring in the lemon layer.  After baking you’ll have to let them cool for about two hours before cutting them. Sorry that you can’t dig right in. 
    The first layer is a buttery shortbread crust.  The crust is so good!  Top that with a refreshing lemon filling and a dusting of powdered sugar and you have the perfect lemon bar.  You know what I might just be making these luscious bars for every tennis match and change their name to Lucky Lemon Bars.  Yes, I won my tennis match thanks to my partner Angela and to the Lucky Lemon Bars!
    Luscious Lucky Lemon Bars from Southern Living
    Makes about 2 dozen
    • 2 1/4 cups all-purpose flour, divided
    • 1/2 cup powdered sugar
    • 1 cup cold butter, cut into pieces
    • 4 large eggs
    • 2 cups granulated sugar
    • 1 tsp. lemon zest
    • 1/3 cup fresh lemon juice
    • 1/2 tsp baking powder
    • Powdered sugar
    1. Preheat oven to 350 degrees.  Line bottom and sides of a 13 x 9-inch pan with parchment paper, allowing 2 to 3 inches to extend over the sides.
    2. Stir together 2 cups of flour and 1/2 cup powdered sugar.  Cut in butter with a pastry blender until crumbly.  Press mixture onto bottom of prepared pan.
    3. Bake at 350 degrees for 20 to 25 minutes or until lightly browned.   
    4. Meanwhile, whisk eggs in a large bowl until smooth; whisk in granulated sugar, lemon zest, and lemon juice.  Stir together baking powder and remaining 1/4 cup of flour: whisk into egg mixture.  Pour mixture over hot baked crust.
    5. Bake at 350 degrees for 25 minutes or until filling is set.  Let cool in pan on a wire rack 30 minutes.  Lift from pan, using sides of paper as handles.  Cool completely on a wire rack (about 30 minutes).  Cut into bars; sprinkle with powdered sugar. 
    Happy Cooking,

     Top chef

    Continue Reading...

    Bran Muffins Dianne’s Style

    Bran Muffins Dianne’s Style


    It is the start of a new year, a new semester, new students and new excitement in my classroom.  With all this newness I still have to be organized and ready to go.  I have one day of professional learning and a work day before the new invasion.  This weekend I made my favorite Bran muffins to freeze and have ready for breakfast.  These are great muffins and they make a lot!  I mean a lot!  One of my very dear friends and her daughter brought food over when my daddy died 3 1/2 years ago.  JHM  made the best meatloaf and  these muffins.  Of course I had to have the recipe.  It came from her Aunt Dianne.  I have added a little to it, but here it is for you to enjoy.  By the way the batter will keep for up to six weeks in the refrigerator.  I always get rave reviews when I have guests for breakfast and bring these things out of the freezer and pop them in the microwave.  YUMMY!
    Start with 3 cups of all-bran cereal
    5 cups of bran flakes
    Add 1 quart of buttermilk to the cereals and let it sit for about 30 min.
    Mix together 5 cups of plain flour, 5 teaspoons soda, 2 teaspoons salt and 3 cups sugar
    whisk together 4 eggs and 1 cup of oil
    Add eggs and oil to cereal and buttermilk mixture. Stir!!
    Add dry ingredients and stir!!!
     I usually put cereal and buttermilk in a huge Tupperware bowl, then measure dry ingredients in a separate bowl,  and eggs and oil in a measuring cup.  I do all the mixing in the Tupperware bowl.  Store the mixture in the Tupperware bowl for up to six weeks.  Because I was taking photos just look at all the bowls I used and my dishwasher was already full!
    Too many bowls and not enough washers!
     Here is where I changed Dianne’s recipe a little.  Really I just added a few goodies.  As an afterthought I wish that I had added a little cinnamon with the apples and raisins.  These muffins are almost like apple cake without the frosting!
    I took out some of the batter,enough to make 24 muffins.  I didn’t measure it, but I am guessing it to be about 6 cups.  My medium mixing bowl was about half full.
    Added about 1/2 cup of raisins
    1 medium apple diced
    Fill muffin tins and ready to bake for 15-20 min. at 400 degrees
    Ready to eat or freeze for later!
    Here is the recipe ready for you to make and enjoy!
    Bran Muffins
    • 5 cups bran flakes
    • 2 cups All bran
    • 5 cups plain flour
    • 5 teaspoons soda
    • 2 teaspoons salt
    • 3 cups sugar
    • 4 eggs
    • 1 quart buttermilk
    • 1 cup oil
    Soak cereal in buttermilk for about 30 minutes.  Add eggs and oil.  Stir in flour, sugar, soda and salt.  Bake at 400 degrees for 15 -20 minutes.  Mix can be stored in the refrigerator for up to 6 weeks.
    Happy cooking,

    Top chef
    Continue Reading...

    dimanche 8 septembre 2013

    Hummingbird Cake

    Hummingbird Cake

    The first time I encountered this wonderful cake was on a romantic dinner with GI Joe!!!  He took me to Dailey’s for dinner before a show at the Fox.  The night was what can I say other than just plain great!  Sorry to say that Dailey’s closed this year so we can no longer experience their wonderful desserts.  But we can treat ourselves to the delicious cake that they served.   After that night we took the Athlete there before seeing the Christmas Carol and to this day it is his favorite dessert!  So here is a family favorite for many reasons.  I hope that you can enjoy as much as we have.
    This is not your normal cake where you cream butter and sugar and then add flour alternately with liquid.  It is made by the muffin method of mixing.  In other words it is just plain easy!!!

    Grease and flour then line with wax paper 3 8-in. cake pans
    Sift cake flour and measure 3 cups
    Add to flour 1 t baking soda
    Add 1 t salt to flour
    Add 1 t cinnamon to flour
    Drain 8 oz. of crushed pineapple
    I usually keep frozen bananas in the freezer for banana bread, muffins, and smoothies.  So I just pulled out about 3-4 frozen bananas and put them in a ziplock bag.  Let them defrost a little and mashed them with my hands. Then measure 2 cups.
    2 cups of mashed bananas
    Beat 3 eggs and 1 1/2 t vanilla
    Add to 1 1/2 cups of oil
    Beat eggs, oil and vanilla
    Pour liquid ingredients into dry ingredients
    Stir but DO NOT use a mixer!
    Add 8 oz drained pineapple, 2c. mashed bananas, and 1 cup chopped pecans
    Mix. Notice that I am now using a wooden spoon.
    Pour equally in 3 8-in. cake pans
    I know!  One of them is a dark pan.  I do not know how I have ended up with this pan in my kitchen, but I have to use it.  I have nothing else!
    Bake the layers at 350 degrees for about 25-30 minutes.  Let them cool in the pans for about 15 minutes.
    Put the cooling rack on top of the pan then invert it.
    Remove the wax paper
    Look at my fingers!!  What happened they look blue and wrinkled like some dead mummy’s fingers?
    You can let them cool enough to frost or I make them ahead of time and freeze.  Then when you are ready to frost just pull them out and you are good to go!!
    Here are the steps for making the Cream Cheese Frosting.
    16 oz. of powdered sugar, 8 oz cream cheese, stick butter, 1 t. vanilla and 1 cup chopped pecans
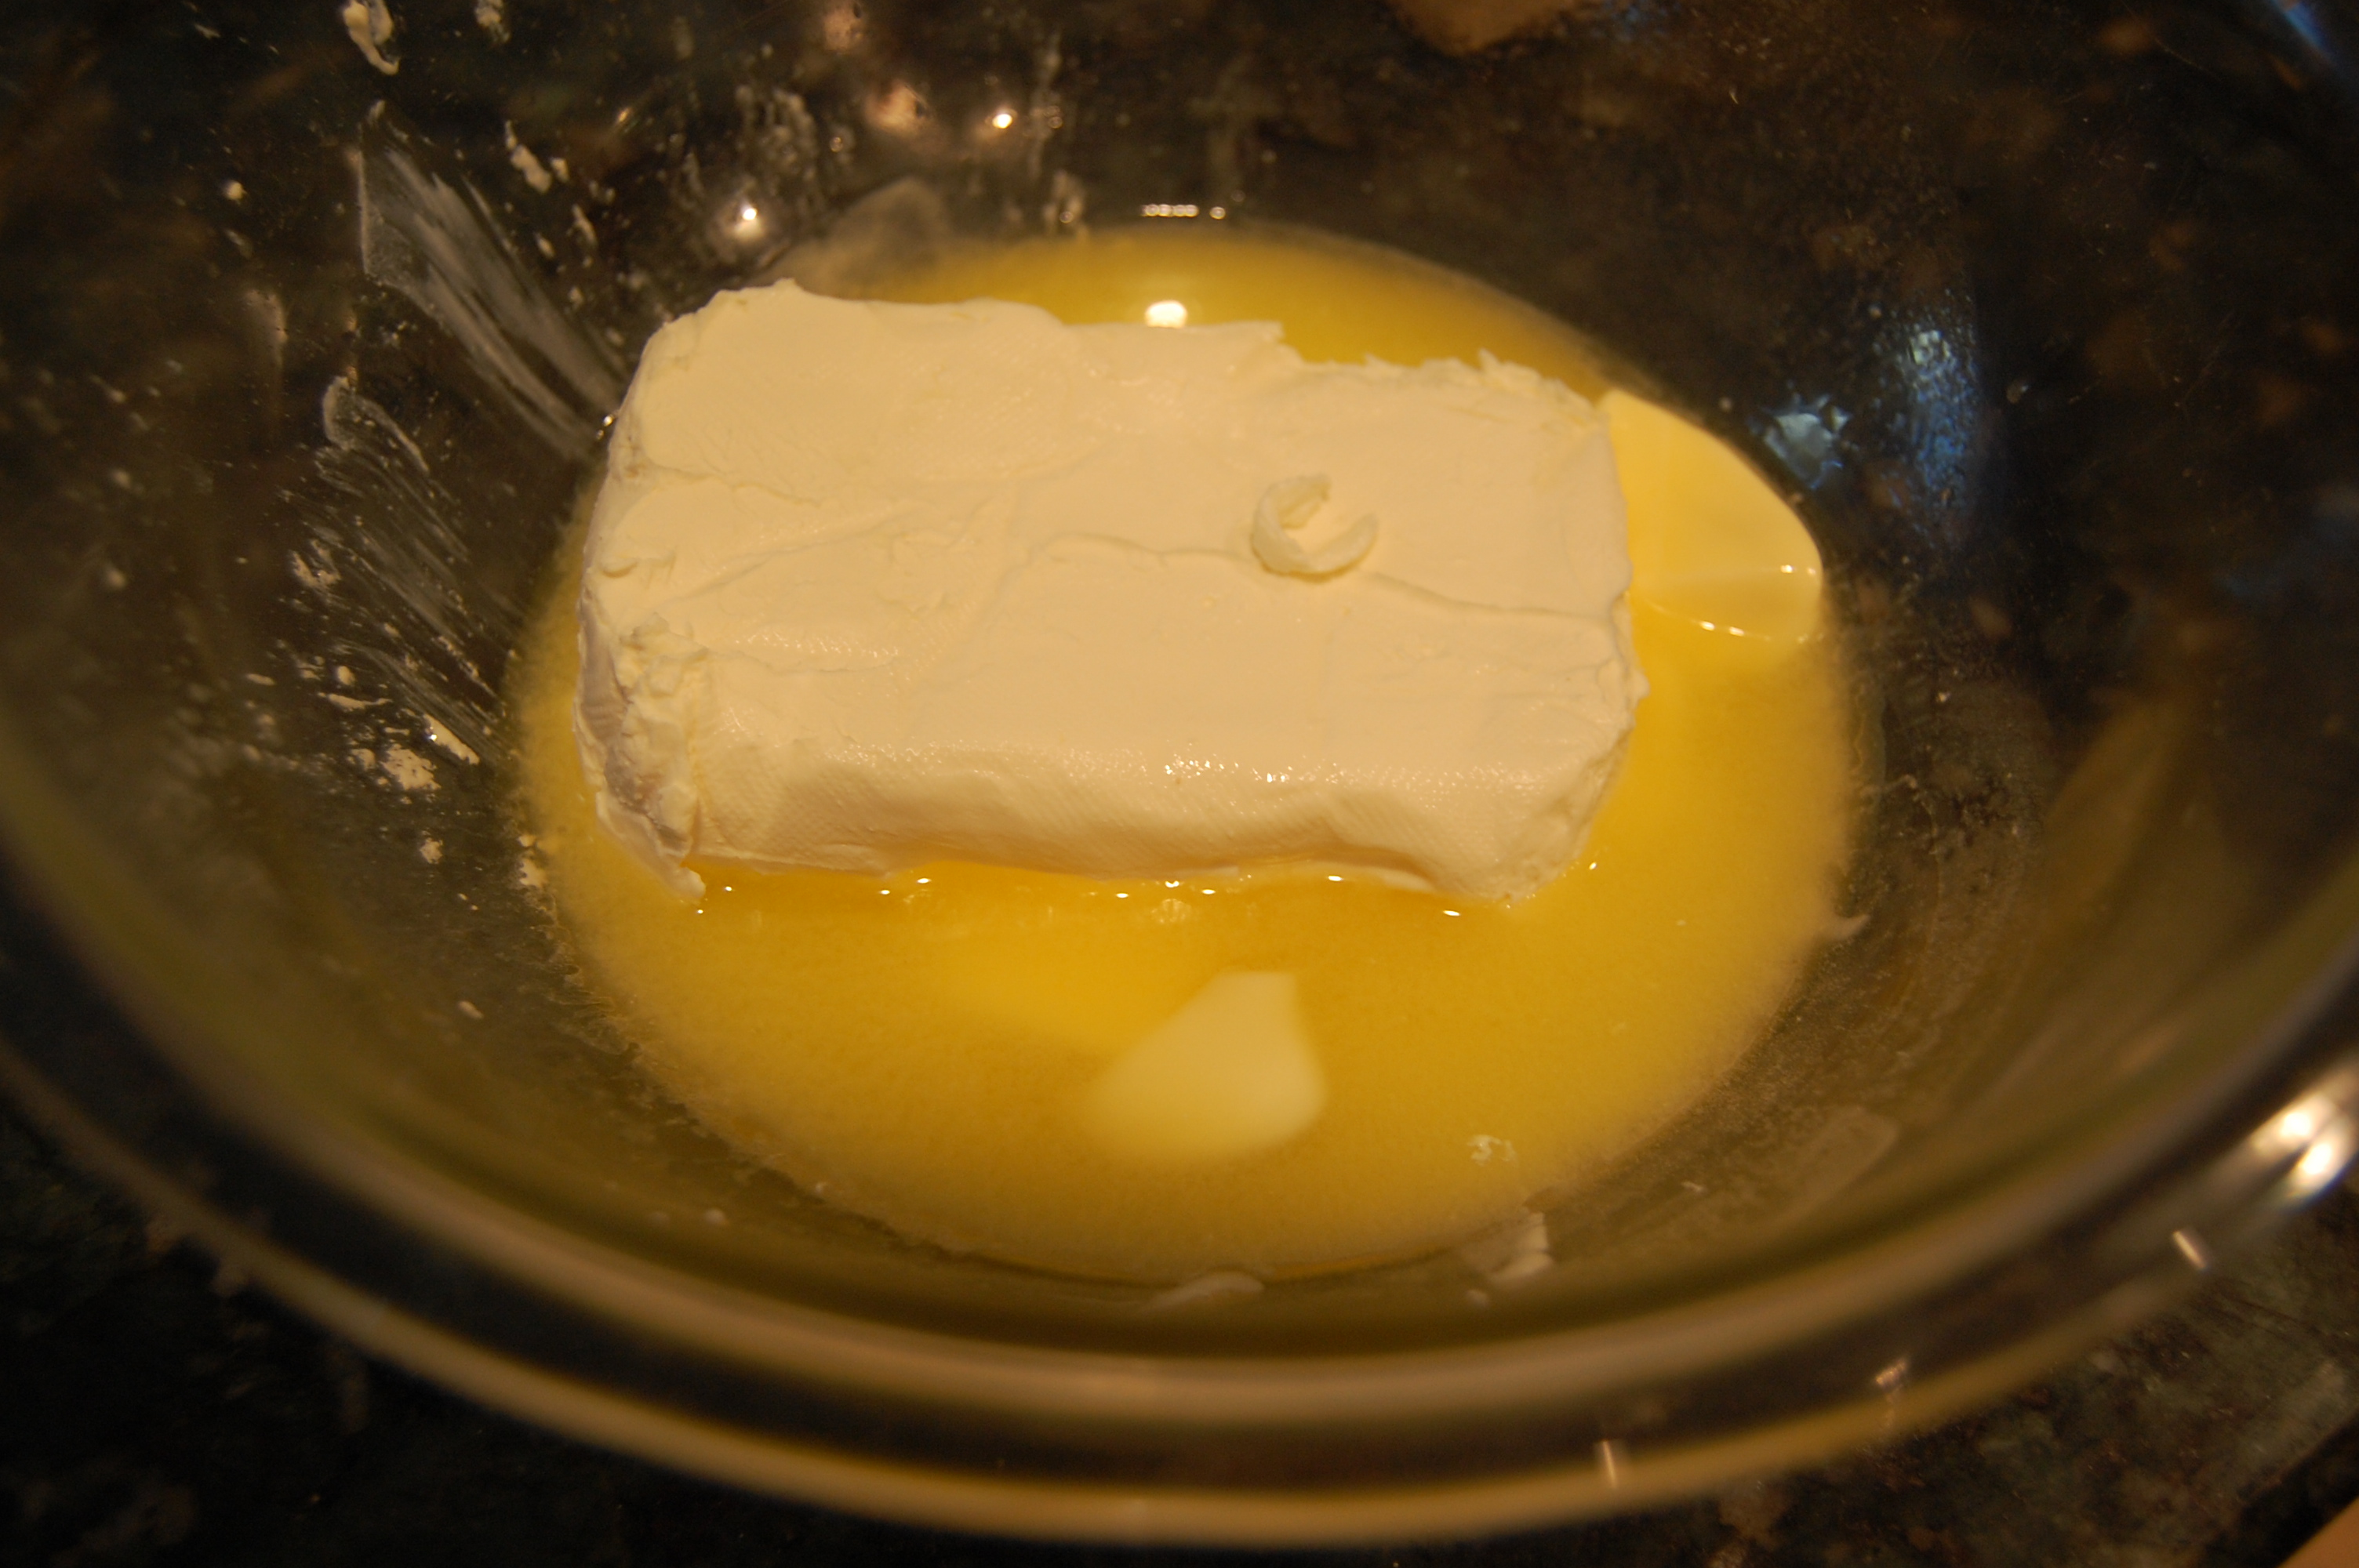
    Mix melted butter with softened cream cheese
    Mix with an electric mixer
    Add 16 oz. powdered sugar and 1 t vanilla
    Mix with wooden spoon and then stir in 1 cup chopped pecans
    Place 1 layer on cake plate and frost then place 2nd layer on top
    Just a note here.  I like to place the rounded tops of the cake down.  And I should have placed wax paper strips around the bottom of the cake to keep the plate clean when I frosted it.  Forgot!  But put them around in a later photo.  It worked!  Thank goodness!
    Looking nice!
    Frost the sides
    Frost the top
    Supposed to wait to Christmas Eve, but….
    Couldn’t resist!
    I have been known to tell my students that this cake was made of little hummingbirds.  At least for about 2 seconds before the tears flowed!  I looked for the origin and could not find much.  It was first published in Southern Living in 1978 by a woman in North Carolina.  Some say that it gets its name because it is as sweet as hummingbird nectar.  Whatever the origin it is a keeper on my list of desserts.  Here is the recipe for you to enjoy!
    Hummingbird Cake
    • 3 cups cake flour
    • 2 cups sugar
    • 1 teaspoon salt
    • 1 teaspoon soda
    • 1 teaspoon cinnamon
    • 3 eggs beaten
    • 1 1/2 cups oil
    • 1 1/2 teaspoon vanilla
    • 1 8 oz. crushed pineapple drained
    • 1 cup chopped pecans
    • 2 cups mashed bananas
    Combine dry ingredients.   Add eggs, oil and vanilla.  Stir by hand just until moist.  Add pineapple, bananas and pecans.  Spoon batter into 3 well greased 8- inch cake pans.  Bake at 350 degrees for 25 to 30 minutes or until the cake begins to fall away from the pan.  Let in cool in pans for about 15 minutes before removing.  Remove from pans and cool on cooling racks.  Cool thoroughly before frosting.  May be frozen for up to 3 months before frosting.  This will save time when things get a little crazy around the holidays.
    Cream Cheese Frosting
    • 1 stick of melted butter
    • 1 8 0z package of softened cream cheese
    • 16 oz. powdered sugar
    • 1 teaspoon vanilla
    • 1 cup chopped pecans
    Melt butter and mix with softened cream cheese.  Stir in vanilla, sugar and nuts.   I like to put the round top down and frost the flat side of the cake.  Place strips of waxed paper under the cake to save on clean up.  Frost the top of the first layer and place the second layer round side down.  Frost the second layer.  Now add the third layer round side down.  Frost the sides then the top.  I have been known to grind up more pecans and push them into the sides.  Or you can take some pretty candied red cherries and make a holiday design on the top, but the recipe without any additions is the most moist and best tasting cake you have ever put in your mouth .
    Continue Reading...